
Getting started
This guide takes you from an empty terminal to a working payment link. It covers authentication, the identifiers the API expects, and how the four modules fit together.
On this page
1. Get your credentials
Register or log in to the merchant portal at pay.tiankii.com. You can sign up with a phone number, an email address, or single sign-on via Google, Microsoft, or Twitter.
Create your API key
Go to Store settings → Development Workspace and click Create API Key. Fill in the form, then click Copy Secret.
Copy the secret before you leave the screen. The list only ever shows a masked preview, so once you navigate away there is no way to recover the full value — you’d have to create a new key.
Get your store_id
Your Store ID is shown in the Credentials card, under Store ID — it identifies your store in every API request. Click the copy icon to grab it.
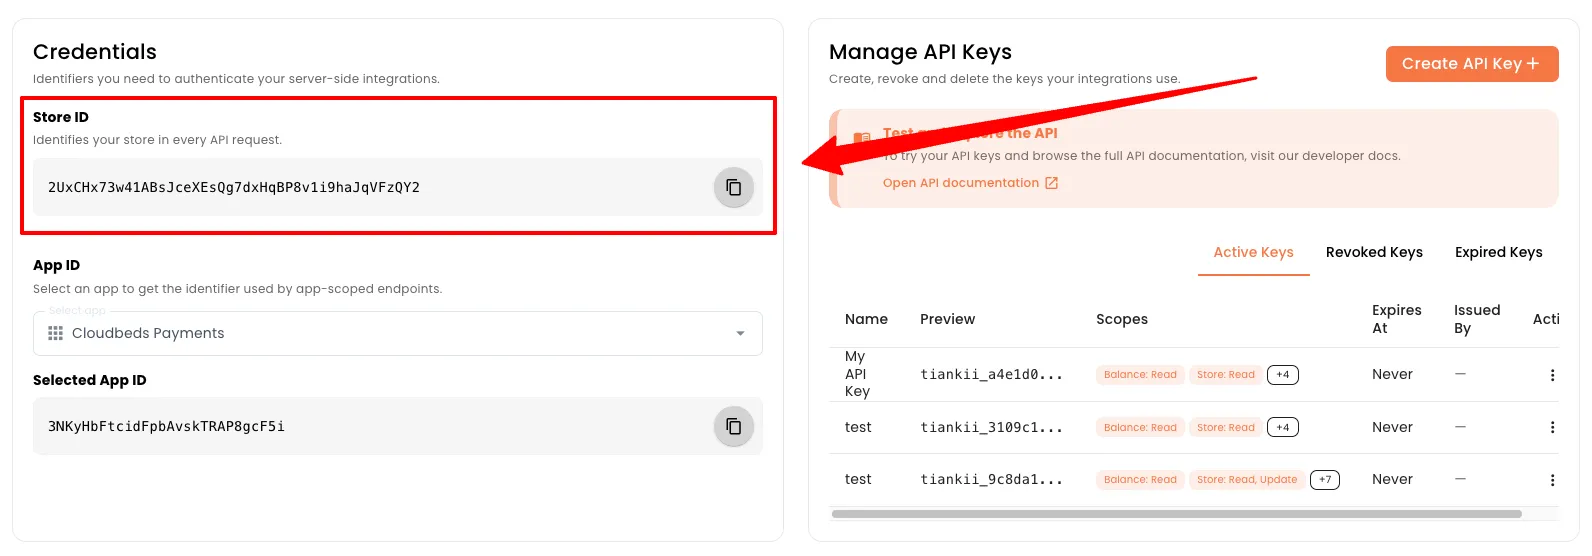
Get your app_id
In the same Credentials card, open the Select app dropdown and pick the application you’re integrating. Its identifier appears below as Selected App ID, ready to copy.
This is the value that app-scoped endpoints expect. If you work with more than one app, repeat the selection for each.
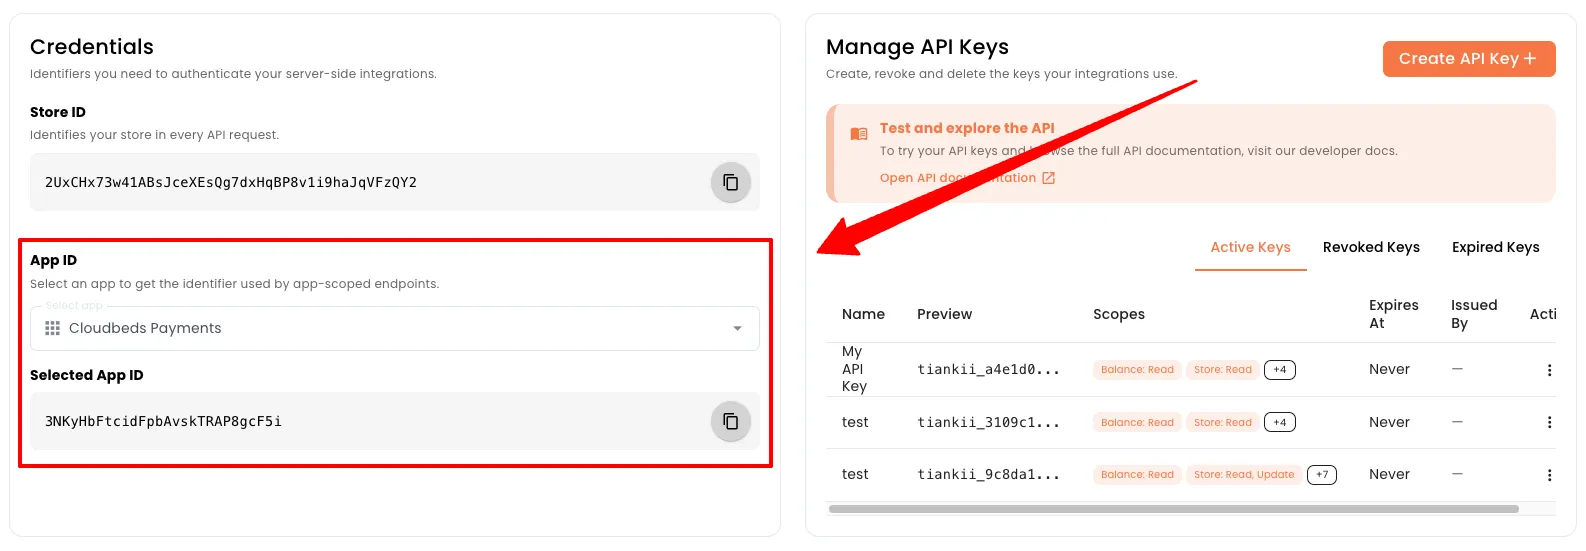
What each identifier is for
2. Authenticate
Every request sends your key in the x-api-key header:
x-account-api-key works as an alias for x-api-key. To scope a key to a specific store or account, send x-application-account-id (alias x-account-id), or pass it as the application_account_id / account_id query parameter.
Never expose your x-api-key in public repositories, browsers, or any client-side code. Treat it like a password — it authenticates as your merchant account.
3. How the modules fit together
Each module’s reference section opens with a detailed overview — scopes, constraints, and related routes. Start with the API Reference once you’ve made your first call.
Invoices vs. checkout invoices. An invoice is a payment request of type INVOICE — the bill that is issued, living under /v1/payment-requests/billing-invoices. A checkout invoice is the /v1/invoice module — the charge that is executed. Two different objects.
4. Make your first call
The fastest way to get paid is a payment link: create it once, share the URL, collect one or many payments.
Every other endpoint follows the same shape. The API Reference has a runnable example for each one.
5. Typical flows
Bill a customer and get paid
POST /v1/customers— create the customer, or find them withGET /v1/customers.POST /v1/payment-requests/billing-invoices— create the bill against thatcustomerId.POST /v1/payment-requests/billing-invoices/:id/send— email it to one or more recipients.GET /v1/payment-requests/billing-invoices/:id/pdf— download the PDF if you need a copy.- When the customer pays, a checkout invoice is generated. Track it with
GET /v1/invoice/:idandGET /v1/invoice/:id/events. PATCH /v1/payment-requests/:id/complete— close out the payment request.
Reconcile a charge
GET /v1/invoice— list charges.GET /v1/invoice/:id/events— inspect the full event trail for one charge.PATCH /v1/invoice/:id/reopenorPATCH /v1/invoice/:id/cancel— correct a charge that went wrong.POST /v1/invoice/:id/notification— re-send the paid-invoice notification.